EVOX HEADS info
We are excited to announce that we have got the approval from LELUTKA to use their UV MAP for the BOM SKIN & BOM MAKEUP layers of our upcoming new CATWA EVOX HEADS line,
HD Makeup layers will have the HDPRO UV MAPS.
CATWA EVOX Heads Compatability:
– BoM skin & BoM makeup must be EVOX.
– Makeup Appliers must be CATWA or CATWA HDPRO.
– Materials must be CATWA-EVOX.
Everything else is exactly like the HDPRO, please use the HDPRO manual here. Also have a look at this Quick-Start Guide wrote by virtualbloke
Memorandum of CATWA Company Association
HDPRO Updates LOG
Since this is very new mesh and very new scripts, we may find few glitches that shall be fixed real quick.
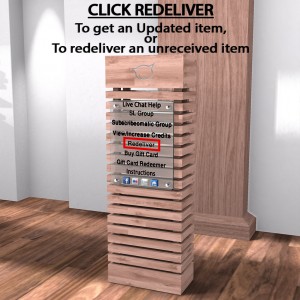
Click the Re-delivery at CATWA Store to get Updates

How to update Easily:
1-Wear OLD head version
2- Gear tab, PRESET APPLIERS
3- SAVE
4- Wear NEW head, keep same HUD for now
5- Gear tab, PRESET APPLIERS
6- APPLY
7- You can switch HUD now to updated one.
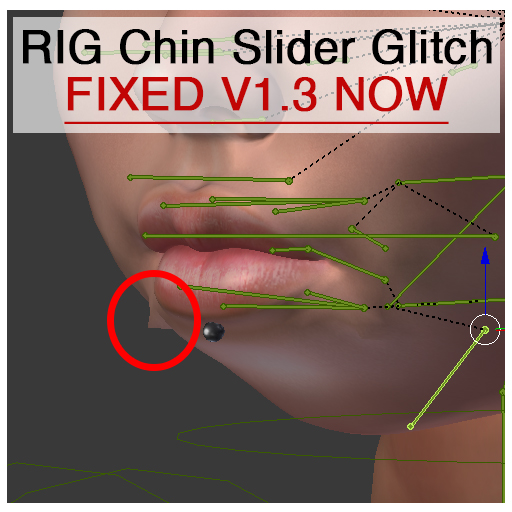
Female HDPRO [HEAD v1.3] Update 27th Sept 2020:
-BOM Pack:
Added Brows, and some cheeks tattoos.
-Head Updated to v1.3:
Rig [Chin slider] Glitch Fixed.
Female HDPRO [HEAD, & Style HUD v1.2] Update 21st Sept 2020:
-Head Updated to v1.2:
Added Killer Wink eyes, and lips moods.
-Style HUD Updated to v1.2:
UUID input buttons now can input HD, & NonHD textures.
Female HDPRO [HEAD v1.1] Update 19th Sept 2020:
-Head Updated to v1.1 [Bug Fixed]
Bug details: Two animations were missing.
Female HDPRO [Style HUD v1.1] Update 18th Sept 2020:
-Style HUD Updated to v1.1 [Bug Fixed]
Bug details: Eyes mask Appliers were using Non-HD settings.
-MajerEdged Head [BentoEar, Earless, and NonBentoEar]
Updated kept same version number:
Bug details: Just noticed it had light on the back, was on even after turning face light off, fixed, kept same version number.
HDPRO HEADS info
CATWA HDPRO, is a project that we have been working on since last year, HDPRO is totally new level that you have never seen before in second life. HDPRO is a new range of advanced Bento mesh heads, created by Catwa Clip of CATWA store. They have many new features (some of which have never been seen before on the Second Life grid), new smoother rigging, high definition textures and materials, and an improved UV mapping that’s now as close as possible to the default Second Life UV. It is also the first Catwa head to feature the new Universal Neck that you will begin to see more of around the grid. Universal Neck is a collaboration between mesh head and body creators to all use a common neck, ensuring that you will not have to worry about neck seams and neck fixes in future. The smile with Bento Bones has never been prettier and that is one of the very first unique feature of the CATWA HDPRO.
Where can I get HDPRO?
You can pick up both the demos (please, ALWAYS try a demo of any mesh head or body before purchase!) and the full versions of the HDPRO heads from the Catwa store inworld or from the Catwa Marketplace store. At the time of writing this post (September 2020), only two female heads—MajerEdged and MajerSoft—have so far been released. A male head is on its way.
Is HDPRO Bakes on Mesh (BoM) compatible?
Yes. While you can use skin appliers and other appliers on HDPRO, it has been created with BoM in mind. You will find that more and more creators are now moving to BoM heads and bodies, and HDPRO is no exception. If you are familiar with Catwa’s Bento heads then you will know that they feature more than one layer, allowing for greater customisation via the upper and lower layers. With HDPRO these layers have changed and the focus is more on BoM layering, but you still have some applier support.
To learn more about Bakes on Mesh (BoM) read this Bakes on Mesh ‘for Dummies’ guide.
Can I still use appliers on HDPRO?
Yes. HDPRO will take Catwa appliers (and Omega appliers, with the Omega relay for Catwa) for skin, lips, eyes, eye makeup OR brows (I’ll get into the exact specifics of that shortly when I explain the new Eye Mask area), and ears. However, the additional hairbase, blush, and neck layers have been removed from HDPRO. This means—for instance—that you cannot wear an applier skin and then put an applier hairbase on top of it. Nor can you wear an applier skin and blush or freckles. Many hairstyles come with a built-in hairbase look these days, but if you want to wear a textured hairbase with HDPRO then you will need to activate BoM and use a BoM skin and BoM hairbase.
As mentioned previously, with more and more of the grid moving to BoM, the focus of HDPRO is Bakes on Mesh, but Catwa has retained applier support for some areas of the head and improved it for those areas, too, as the Eye Mask area, Lips area, and Ear Mask area are all HD, allowing for much higher definition textures.
Note: You must be wearing the HDPRO Style HUD when using appliers.
Will my old Catwa appliers still work on HDPRO?
Yes, but be aware that because the UV mapping is different on HDPRO some older Catwa appliers may not look quite correct, especially around the eyes, nose, and brows. There is no hairbase, neck tattoo, or blush layer, so appliers for those will not work. Please consider enabling BoM on your head and using BoM layers for hairbases, blush, freckles, and tattoos that come up over the neck, etc.
Note: You must be wearing the HDPRO Style HUD when using appliers.
What skins come with HDPRO?
All included skins with HDPRO are in BoM tattoo layer format. At the time of writing this post, the initial skins for the female heads are by DeeTaleZ (MajerEdged head) and TheSkinnery (MajerSoft head). Initial skins for the male heads will be provided by LV Designs and Stray Dog.
Why does the demo have pieces missing from it? Is it broken?
The demo has small strips of ‘missing pixels’ as an anti-copybot precaution. HDPRO demos are fully functional, and are not broken. You can do everything with the demo that you will be able to do with the full version. Please note that the demo only contains the Bento ears version, and not the earless version or non-Bento ears version. Nor does it contain the BoM skins.
I already have a CATWA head. Will it be upgraded to HDPRO?
Sorry, but no. HDPRO is an entirely new type of head. It is a completely different build with completely different rigging. It won’t be possible to ‘upgrade’ a non-HDPRO head to be HDPRO. There will also be no ‘pay the difference’ options for current Catwa users to get an HDPRO head just by paying the extra L$900! Trust me, we’ve already been asked this a lot. It’s not as if you can ‘trade in’ your old Catwa head like you can a used car 😉
Do I need to have Advanced Lighting enabled in order to use or see HDPRO?
No, your viewer’s Advanced Lighting Model (ALM) is not a necessary requirement. You will, however, not be able to see any of the materials used on your head if you don’t have ALM activated. If you plan to try out all the features of your HDPRO head, it is advised to briefly activate ALM to check that you’ve not overdone any materials setting that may make you look odd to those who do have ALM enabled.
Please be aware that it’s possible to run ALM even on medium graphics settings. You don’t need to be on Ultra to have ALM running! Simply enabling ALM with medium graphics and setting your Shadows to Sun/Moon will not put too much of a load on anything but the oldest of computers.
Resizing the HUDs

Both the Style HUD and the Anim HUD can be resized.
Style HUD resize
1: Open the Settings tab
2: At the bottom of the tab, move the Size slider to the right
![]()
Quick tip!
Resizing the Style HUD will move it down and away from the Favorites bar of your viewer. So if it’s in the way of that, make it bigger!
Anim HUD resize
1: Click the outward-facing arrows at the top of the right side of the HUD, as many times as you need to, until the HUD is the size that you want
![]()
Putting a skin onto the head
When you first wear your HDPRO head it will appear white. You can either wear an alpha layer and apply a Catwa (or Omega, with the Omega relay for Catwa) skin, or you can activate BoM on the head. A reminder, though: if you wear a skin applier you cannot then add a hairbase applier over the top of it. You must be wearing the HDPRO Style HUD when using appliers.
Activating BoM on HDPRO
![]()
1: Remove your alpha layers (they are not needed for BoM, unless you intend to continue using applier eyes—either from the HDPRO HUD or a third party applier—for which you will need to add the CATWA HDPRO ALPHA EYES [Applier Eyes] [BOM the rest] alpha layer from your head’s folder)
2: Add the CATWA HDPRO HUD STYLE
3: Open the Skin tab
4: Click the BoM button
Your HDPRO head comes with an unpackable set of BoM skins in tattoo layer format. These are for the head only, so you will need to purchase the matching body skins from the designers’ mainstores.
Colouring sections of the head
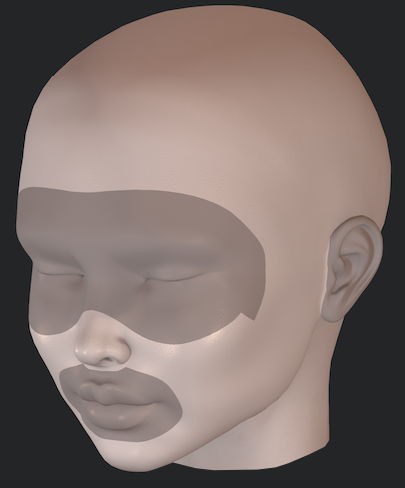
When you first wear the HDPRO head, the eyelashes, lacrimal, teeth, tongue, and inner mouth are all grey. We’re going to customize them one at a time.
Colouring the lashes
![]()

HDPRO heads have two sets of lashes: Pro and Basic. Pro lashes are especially painted with detailed textures and materials, and come in four base colors (black, brown, blonde, and grey) that you can subsequently tint if required. Basic lashes are plain white tintable lashes without materials.
1: Open the Eyelash tab
2: Choose the style you want by selecting one of the two small boxes between PRO and BASIC. The box you select will be filled with a light grey colour. In the image below, the Pro lashes are selected
![]()
3: Select the lash style you want from the eyelash images. You can mix and match upper and lower lash styles by selecting one of the two small boxes between UPPER and LOWER and then clicking the lash icon for the style that you want to apply to that particular lash section. In the image below, both upper and lower lashes are selected. You can also use the SIZE slider to change the length of your lashes.
![]()
4: To change PRO lash base colours, click the same lash icon repeatedly. 1 = black, 2 = brown, 3 = blonde, 4 = grey. (Yes, you can even use this to colour the upper and lower lashes in different base shades!) Basically, anywhere that you see the below icon on the Style HUD it means you can click the same icon more than once to access different options:

5: Open the Tint tab
6: Select the eyelash icon under Active Layer
7: Click in the large ‘rainbow box’ to select your base colour. The higher in the box you click, the more intense the colour. The lower in the box you click, the more muted the colour
8: Click in the thin ‘monochrome slider panel’ to fine-tune your base colour: darker to the left and lighter to the right
Quick tip!
Want to find a nice brown shade? Click around this area in the rainbow panel for your base colour:

Tinting the Basic lashes works exactly the same way, except Basic lashes don’t have the four clickable starting colour options. They are just plain white. Select the box next to BASIC, then tint the lashes as shown in the above video.
Colouring the Lacrimal
![]()
The lacrimal is the small ‘tear duct’ at the inner corner of the eye. The HDPRO Style HUD has five tones for it.
1: Open the Eyes tab
2: Select the lacrimal colour that you want.

3: The first click on the lacrimal option will change the colour and add materials. A second click on the same option will remove the materials
4: If desired, the lacrimal can be further tinted using the Tint tab. Click the lacrimal icon under ACTIVE LAYER and tint as shown above
![]()
Colouring the teeth, inner mouth, and tongue


When you first wear the head, the teeth, inner mouth, and tongue are all grey. They can be styled individually using the Mouth tab. It’s also useful to use the Freeze Mouth option, so you can see what you’re doing.
The mouth styling options have three boxes, as below. Check the box next to the option you want to texture. From left to right they are: Teeth – Inner Mouth – Tongue. As before, the box that you have selected will be filled with light grey. In the image below, the inner mouth is selected.
![]()
Here is the mouth styling section in full (minus the materials sections, as we are focusing solely on getting you set up in this post!)

The top row of coloured images is for normal tongue, and the bottom row is for split tongue. The MED/SML boxes (to the right of the main styling option boxes) are to adjust the width of the tongue.
1: Select your teeth style from the tooth images. You have multiple options, including gaps, a chipped tooth (it’s a very small chip; don’t expect to look like you’ve had a fist in your face!), and vampire fangs.
2: Check the box next to the ‘tooth’ icon (the left of the three boxes) and click through the coloured mouth images to find your favourite teeth texture. All eight boxes will give a different texture, with the last one on the bottom row being a bloodied one. (TIP: Finding the teeth textures are too bright with the facelight enabled? Watch the video below to learn how the Environment slider can help you out!)
3: Check the box below the ‘open mouth’ icon (the middle of the three boxes) and click through the coloured mouth images to find your favourite inner mouth texture. All eight boxes will give a different texture
4: Click the box to the left of the ‘tongue’ icon (the right of the three boxes) and click through the coloured mouth images to find your favourite tongue texture. The colours are mirrored from the top row to the bottom row, with the bottom row featuring a split tongue
Quick tip!
Opting for vampire teeth? Make sure you check the SML option for the tongue, because that’s the best fit for the fangs.

Activating BoM on HDPRO Eyes
![]()
Bakes on Mesh (BoM) can be activated on both the iris (texture) and sclera (shine overlay) of the eyes. If you just want to have your BoM/system eye textures appearing on your HDPRO mesh eyes, then you only want to activate BoM on the iris. Below is an image of the meshes themselves, from Catwa, so you can see what they look like:
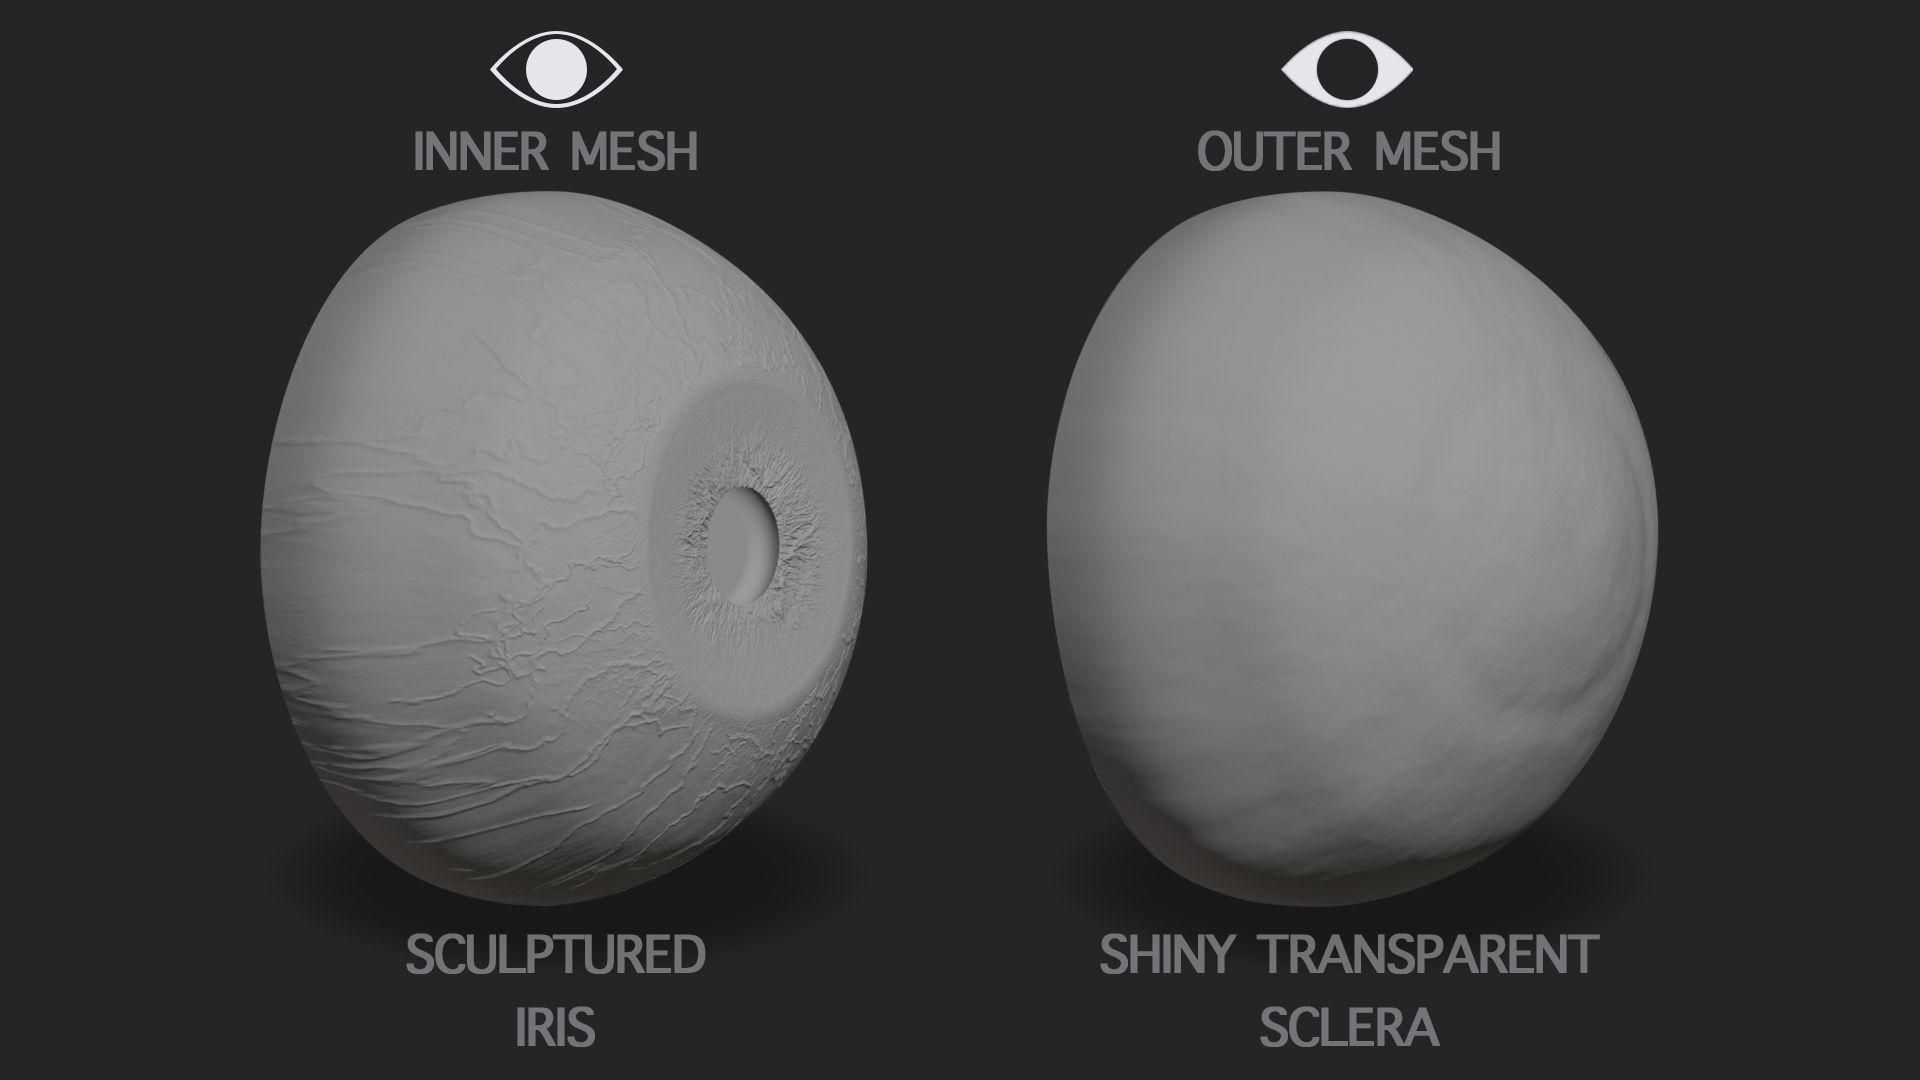
Take a look at the icons below. The left is for the iris (eye texture or coloured part of the eye) and the right is for the sclera (transparent shine overlay). To remember which is which, just look at which part of the icon is white.
![]()
You can see that the box on the left is filled with light grey, so that means I have the iris (eye texture) selected. This is the correct box to have selected when you want to enable BoM on the eyes so that your BoM/system eyes appear on your mesh eyes.
1: Detach any eye alpha that you’re wearing
2: With the IRIS (left side) box checked, click the BoM button. It will highlight pale grey, as below:

3: Your BoM/system eyes will now be showing on your mesh eyes
4: To deactivate BoM on your eyes, attach your eye alpha (note that this will make your eyes turn red all over) and click the BoM button again. The pale grey highlight will disappear, as below, and your eye appliers will show again:

Quick tip!
You can use any Catwa eye appliers on HDPRO eyes, including the ones in the HDPRO Style HUD, any third party eye appliers for Catwa, and any Omega appliers (as long as—for that last one—you’re wearing the Omega relay for Catwa.) Make sure that you have the IRIS (left box) checked before you click the eye applier. Ensure that you’re wearing the HDPRO Style HUD when you want to use third party appliers.If you want to learn more about the materials of the eye (to add some shine and reflections) then keep reading!
Troubleshooting tip!
If you’re using applier eyes and you see something that looks like a glitch at the top of your eyeball, make sure you’re wearing an eye alpha. There is a slight offset between the HDPRO eyes and the system avatar eyes; enough to make you think you don’t need an alpha to hide the system eyes, but they will glitch through the top of the HDPRO eyeball if you’re not wearing an alpha.
Using materials on HDPRO Eyes (Advanced Lighting must be enabled in your viewer to see materials)
![]()
To use the materials option on HDPRO eyes you will need to check the box on the right of the eyes selector. This will set your ‘target’ to the sclera, which is the transparent shine and reflection overlay. Here’s a look at the Eye Materials section:

That looks like a lot of stuff, but I’ll break it down for you below.
- Sclera Blend slider. This allows you to adjust the level of materials shine on your eyes
- The eye selector. To use the materials option, check the right hand box so that it’s filled with light grey
- The BoM button. We’ve just covered that one
- These are the two included sclera materials presets. They will place a glistening 3D-look shine on your eyes. Watch the video below to see them in action
- Glossiness, Strength, and Environment sliders. Glossiness controls the shine value (amount of shine). Strength controls the level of shine (it does this by adjusting the shine colour from white to grey, but it doesn’t mean you see a grey shine; it just means the shine gets a bit less bright). Environment is the slider that should be used with caution, as it will put a very shiny, metallic gloss on anything it’s applied to. Use it sparingly!
- The CLEAR button. This will clear any materials that you’ve applied to the eyes (as long as you have the SCLERA [right box] selected in the eye selector panel. See No.1 on this list)
- Right and Left eye selectors. This allows you to select which eye you want to act on. If you have the IRIS (left box) selected you can use the R and L options to apply different eye textures from the Style HUD, giving you a heterochromic look. If you have the SCLERA selected (right box) then you can apply different materials to each eye by selecting the R and L boxes.
- Eye appliers. You will notice that there are four columns of these: one column for each eye colour, going from lightest on the top to darkest on the bottom. But there are also three rows. Look closely at each row and you will see that—for each eye colour on each row—there is a different highlight: reflected eyelashes, ‘windows’, large circle, and small circle. With the SCLERA (right box) selected you can change the reflected highlights on your eyes
Watch the video below to see how to activate and deactivate BoM, use eye appliers (both from the HDPRO Style HUD and a third-party applier), and also a quick overview of how to use the materials on the HDPRO Style HUD eye appliers. (Since this video has some text instructions on it that may be difficult to read at the resolution this blog allows for, click here to watch the video in full size.) Apologies that it goes quickly! You can always pause it to read the text.
Here is a more detailed video showing the materials options at work.
Applying Lipstick
![]()
You can use any Catwa HD lipstick (including the ones for older Catwa HD Lips), Catwa lipstick, Omega lipstick (with the Omega relay for Catwa) or BoM tattoo layer lipstick on the HDPRO head. The lipsticks included on the HDPRO Style HUD are HD ones, and you have additional materials options for them below the lipstick appliers. Advanced Lighting must be enabled in your viewer to be able to see the materials, but it is not a requirement if you just want to see the HD Lipsticks. (This is different from the HD Lips add-on for the older Catwa Bento heads, such as Catya. Those HD Lips do require Advanced Lighting to be enabled.)
Apply the lipstick just as you would any other lipstick, either from the HDPRO Style HUD, or a third party applier (must be wearing the HDPRO Style HUD when using appliers). For BoM tattoo layer lipsticks to show up you need to have BoM enabled on the head.
The CLEAR button beneath the HUD lipsticks will clear any applier lipstick that you’re wearing.
The BLEND slider allows you to adjust the opacity of the lipsticks. Want a sheer, slightly-coloured lipgloss effect? Apply a lipstick, blend it down, then apply some materials shine.
The MATERIALS icons will apply one of four types of materials to your lips. (Advanced Lighting must be enabled in order to see the materials.) You can control the level of shine using the Glossiness and Strength sliders beneath the Materials icons. You will need some kind of lighting nearby in order to see the materials at their best. Note how—in the video below—I show what the materials look like when I turn off the facelight.
The CLEAR button beneath the Glossiness and Strength sliders will clear any materials that you have applied to the lips.
Changing the ear style and animation – must be wearing the BentoEar version of the head!

There are a lot of things on the ears tab, but since this is a Quick Start Guide I’m only going to deal with the section that changes the ear type. To be able to use these sections of the HUD you must be wearing the BentoEar version of your HDPRO head. They will not work if you’re using the NonBentoEar version or (rather obviously) the Earless version.

STYLE – This is where you can get your ‘elf ear’ on. Each of the four icons will stretch out the tips of your ears.
ROTATION – This allows you to adjust the angle of your ears. Have them close to your head or sticking out sideways!
ANIMATE – Checking this box will start a subtle animation running on your ears. It won’t work on the human ear, but will work on the other three styles (although a fun little tip if you do want animated human ears is to set your ears to one of the ‘elf’ shapes, set the animations running, then set your ears back to human again). Your head’s brain (which really is the brain of your HDPRO head; it’s where all the scripting lives) will detect whether you are standing, sitting, flying, or walking, and it will change the animations accordingly.
Using the Eye Mask section
![]()
The Eye Mask section is brand new to HDPRO, and it’s the one tab that seems to confuse people, if any of the blog and vlog reviews that I’ve seen thus far are anything to go by!
The Eye Mask replaces the old separate eye and brow areas, blending them into a literal ‘eye mask’ area. (On the mesh itself it looks just like a ‘sleep mask’.) Like the lips (and the ear mask, which I’ve not covered in this blog post) the Eye Mask area is an HD area, which means that it allows for much higher definition textures. Get ready for those ultra-realistic #onfleek brows.
As mentioned at the start of this post. HDPRO is designed primarily for BoM, and it responds best to either full BoM or a BoM/applier hybrid. Because the Eye Mask is one single location that means you cannot wear separate applier brows and applier eye makeup. Creators may start making combined brow and eyemakeup appliers, but the best way to get the most out of the Eye Mask area is to ‘go BoM’ on your head, and use BoM brows and BoM makeup, a combination of either BoM brows and applier eye makeup, or applier brows and BoM makeup. (Don’t forget that BoM allows you to layer like crazy, so you can create some amazing and unique makeup looks! Open up the BoM Pack in your HDPRO folder for a great starter kit of BoM hairbases, eye makeup, freckles, and other goodies.)
Note: You must be wearing the HDPRO Style HUD if you’re planning to use appliers.
The main part of the Eye Mask tab has six images in it, which comprise the six included applier options on the HUD. Down the left are images without an eyebrow above them, and down the right are images with an eyebrow above them:

Logically, that means that the images on the left apply without a brow, and the images on the right apply with a brow (for use with a browless skin).
- Left column, top to bottom: tintable eyeshadow – black winged eyeliner – shimmering makeup
- Right column, top to bottom: tintable eyebrow – black winged eyeliner with eyebrow – shimmering makeup with eyebrow
The CLEAR button below the images will clear any eye mask makeup or brows that you have applied
The BLEND slider allows you to control the opacity of what’s on the Eye Mask section
The MATERIALS panel will add materials shine to your eye and brow area (Advanced Lighting must be enabled, and a light source nearby to view materials at their best)
GLOSSINESS and STRENGTH sliders adjust the intensity and tone of the materials shine
The CLEAR button beneath the Materials section will clear any materials that you’ve added to the Eye Mask
The eyebrows are a mid-brown, but you can tint any and all of these items using the Tint tab. Note that any applier eyeshadow and brow combination on the Eye Mask cannot be tinted separately, as it’s one single layer. BoM eyeshadows and brows can—as long as they are separately added items and are modifiable—be tinted individually by editing the tattoo layer.
Quick Tip!
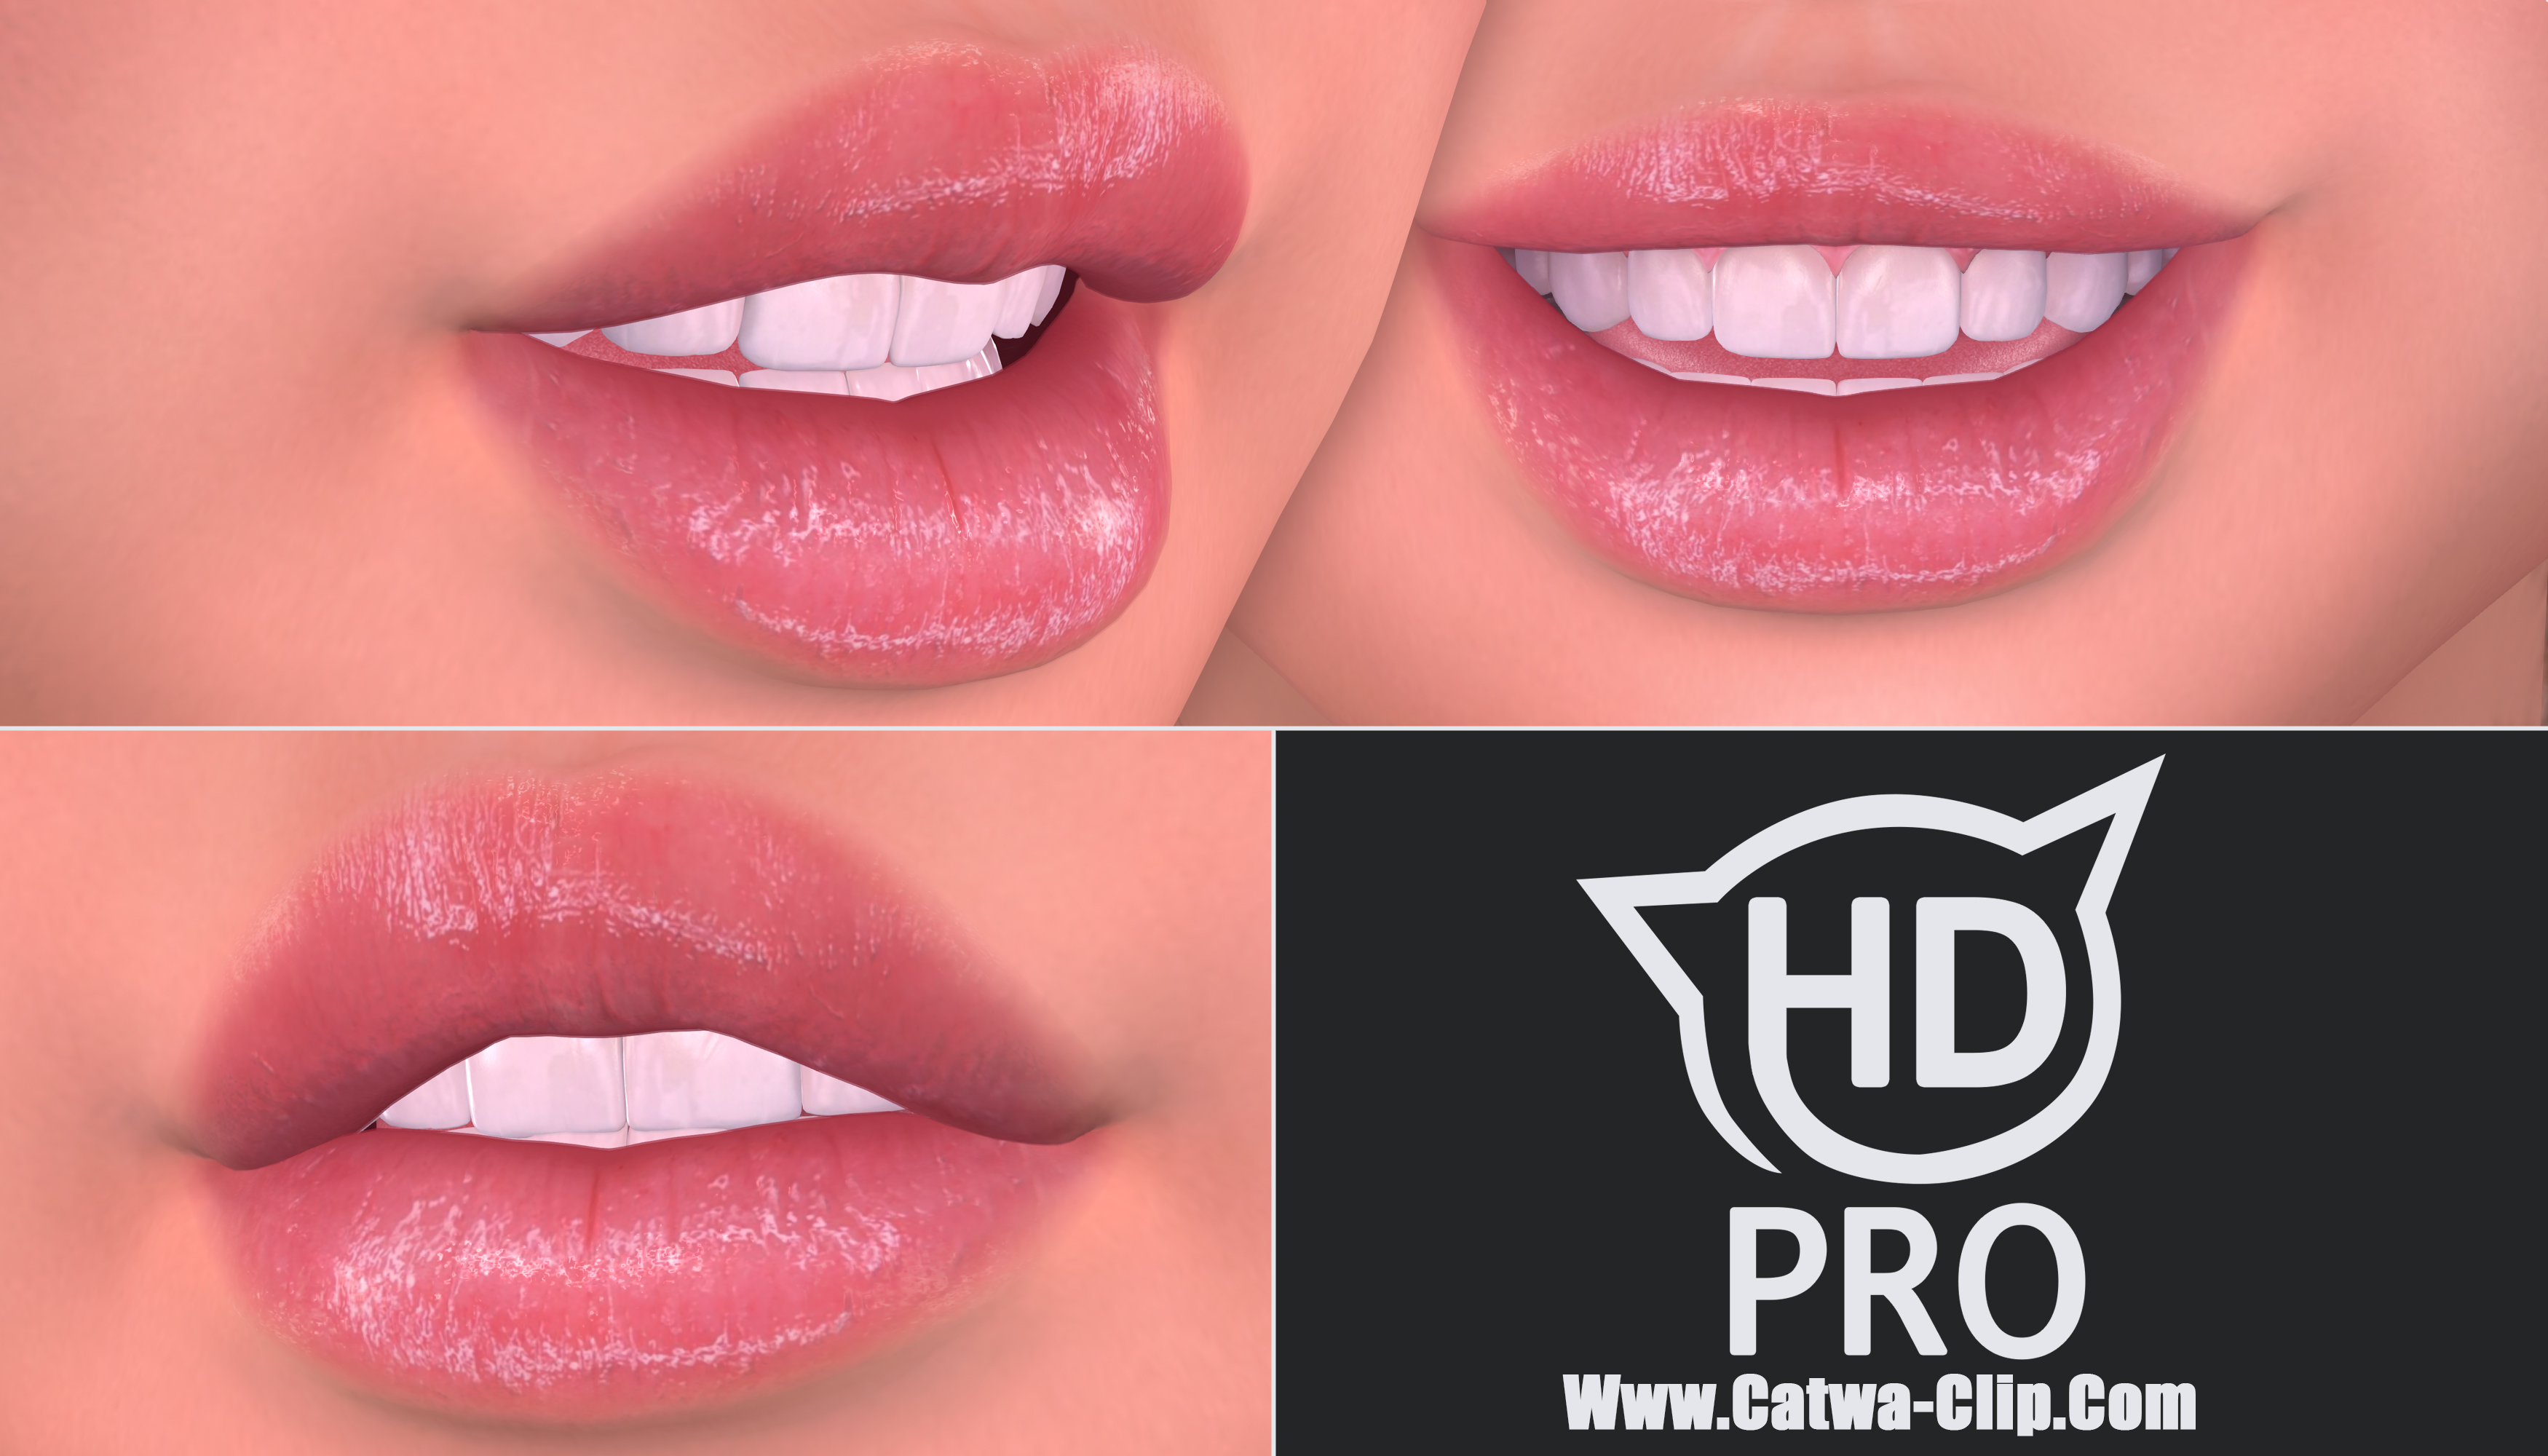
Did you know that you can save eyeshadow appliers to the HDPRO HUD and then apply them to separate eyes, just like in the header image of this post? Watch this video to see how to do it.
The Settings Tab
I know, I know. You’re waiting for those extra sliders, aren’t you? 😉 Well hold your horses, because we have one more tab to go before I dive into those!
The Settings tab is an important one, and it also has a couple of fun things on it, so this is one tab that I’m going to go through in its entirety for this post.
Show/Hide

This is where you can hide sections of your HDPRO head. (Note: alpha layers can also be used for hiding, if you have specific requirements, e.g. for a particular hairstyle). Icons are:
Row 1: Scalp – Tongue – Brain
Row 2: Upper Lashes – Inner Mouth – Teeth
Row 3: Lower Lashes – Right Ear – Left Ear
Row 4: Tears – Iris – Lacrimal
Preset Appliers

This is a button that will save all appliers, tints, and materials you have applied to your head. (Note: it will not save BoM!) It’s especially useful when transferring your usual look to a new version of the head when updates come out. To use:
1: With your head set up how you like it, click the Preset Appliers ‘save’ icon
2: From the popup menu that appears, choose SAVE
3: With the new head attached, click the Preset Appliers ‘save’ icon again
4: From the popup menu that appears, choose APPLY
Reset

This allows you to reset parts of the head (or all of the head) to ‘factory settings’. Icons are:
Top row: Skin – Makeup
Bottom row: Alpha settings – Entire head (all settings)
HUD

Clicking the ‘speaker’ icon will enable or disable the clicking sound of the HUD
Colour Boxes, Transparency, Size

The Colour Boxes are a fun customisation option. They will ‘skin’ your HUDs (both the HDPRO Style HUD and the HDPRO Anim HUD) to the selected colour. Want a pink or navy blue HUD? Go for it!
The Transparency slider allows you to adjust the transparency of the main panels on the HDPRO Style HUD, as well as any popout panels such as the Tint panel and the Pose Freeze panels. It doesn’t affect the side panel of that HUD (the one with the selection icons on it) or any part of the HDPRO Anim HUD.
We already covered the Size slider at the start of this post. This one allows you to adjust the size of the HDPRO Style HUD
Scripts

Use these two with EXTREME CAUTION! Always make a backup of your head before clicking either of the Scripts icons.
The Scripts icons will remove the scripts from your head. The ‘paintbrush’ icon will delete the styling scripts, and the ‘running man’ icon will delete the animation scripts. Once these scripts are removed from your head you will no longer be able to do things like change into and out of BoM, apply appliers, change your ear tips and animations, or animate your head using the Anim HUD.
The Beyond Shape Sliders


HDPRO by Catwa introduces the Beyond Shape Sliders. These are new sliders accessible on the HDPRO Style HUD that only work on HDPRO heads. They can be used in addition to the standard SL shape sliders and offer even greater customisation of your HDPRO head. What is even more exciting about Beyond Shape is that you can also save those additional slider settings, export them and create a simple HUD (using the included developer kit) to recall the settings at any time, share your Beyond Shape sliders with any other HDPRO user, and edit someone else’s HDPRO Beyond Shape sliders in real time. Yes, you can finally help your friend to edit their head shape!
In future you can look forward to shape creators selling not only standard SL shapes for HDPRO but also including additional Beyond Shape slider HUDs. And those HUDs are so simple to make. If you can rez two prims, drag a script into one of them, paste some text into it, then link them together? You’ve got yourself a HUD.
I’m not going to go into full detail of every slider here, but this is the Beyond Shapes tab in its entirety:

Before I tackle what I am going to briefly explain about this tab I want you to look at what’s written on the very bottom of that tab:
MUST RESET SKELETON
That bit is absolutely critical if you’re going to be using these sliders, so I’m going to (metaphorically) hammer it into your head upfront.
If you look at those sliders you’ll notice some that are also on the SL shape sliders, but most of them are not. The ones that are also on the SL shape sliders are there for a reason. A couple of the Beyond Shape sliders will override the SL shape sliders. For example: if you edit the Beyond Shape Nostril Height then you will not be able to edit the SL shape slider for Nostril Width, so a Nostril Width slider has been included in the Beyond Shape sliders.
You can edit many more bones than the SL shape has available. Watch Catwa’s video where she introduced HDPRO to the grid to see some of them in action. They can be combined with the SL shape sliders in many configurations that allow for incredible customisation.
After making any edits to the Beyond Shape sliders you MUST reset your skeleton. (Herein is the second ‘hammering it into your head’!) To do this:
LOCAL RESET (will reset your skeleton on your viewer only) – Right-click your avatar > Appearance > Reset > Skeleton
GLOBAL RESET (will reset your skeleton for everyone) – Either teleport to another region or relog (a relog is the best option, and thus best done when you’ve finished customising)
You must do both a LOCAL reset and a GLOBAL reset once you’re done customising your Beyond Shape sliders.
Warning!
When trying out the Beyond Shape sliders please ensure that you’re not still in Edit Appearance mode (editing your SL shape sliders) at the same time, as that can cause the Beyond Shape sliders to either glitch out or not appear to move at all. Edit the Beyond Shape sliders, then reset skeleton (right-click your avatar > appearance > reset > skeleton), and then move into Edit Appearance (SL sliders) for more tweaks. Save that SL shape with a new name, come out of Edit Appearance, and then back into Beyond Shape sliders. Always remember to reset skeleton when using Beyond Shape. (That’s your third hammer!)
CLEAR – This will reset your face and clear the Beyond Shape sliders. Have you guessed what you need to do after you clear those sliders? Yep. Reset Skeleton!
If you take off your HDPRO head after using Beyond Shape sliders, and put on any other mesh head then guess what you have to do in order not to look a bit, well… odd? Uh-huh. That reset skeleton thing again 😉
SHARE ICON – Here’s where the real fun begins. The SHARE icon is where you can export your Beyond Shape sliders to make a HUD (either to use yourself or to resell; please read the notecard about setting script permissions that’s included in the developer kit!) or share them with another HDPRO user. It’s also where you can edit another HDPRO user’s Beyond Shape sliders (with their permission, of course) in real time using Live Share. Please note: You must both be near to each other in order to Live Share.
Live Share – must be done in exactly this order
- Recipient clicks SHARE icon, then RECEIVE
- You click SHARE icon, then LIVE SHARE
- Recipient ACCEPTS the share
- You can now edit the recipient’s Beyond Shape sliders. The Beyond Shape sliders in their HDPRO Style HUD will be greyed-out while this happens, and your Beyond Shape sliders will appear dotted
- When finished, click the SHARE button again to stop the live share
- Recipient now has the option to KEEP or ROLLBACK the Beyond Shape sliders that you changed
- Remember to RESET SKELETON!
Links and Manual
![]()
The final tab on the HUD is the Links / Manual tab. Use the small boxes at the top to go between the LINKS and the MANUAL.
The Links tab contains all of Catwa’s website and social media links, as well as a link to the Catwa Discord server, which you can join for support (because let’s face it, group chat in Second Life is thoroughly borked of late) and see new releases from designers, both for HDPRO and other Catwa heads.
The Manual tab contains multiple pages that hold brief descriptions of what everything in the Style HUD does.
HDPRO HEAD Layers are:
-Base Layer [BOM Recommended]
-Eyes Mask layer
-Ears Tattoo Layer
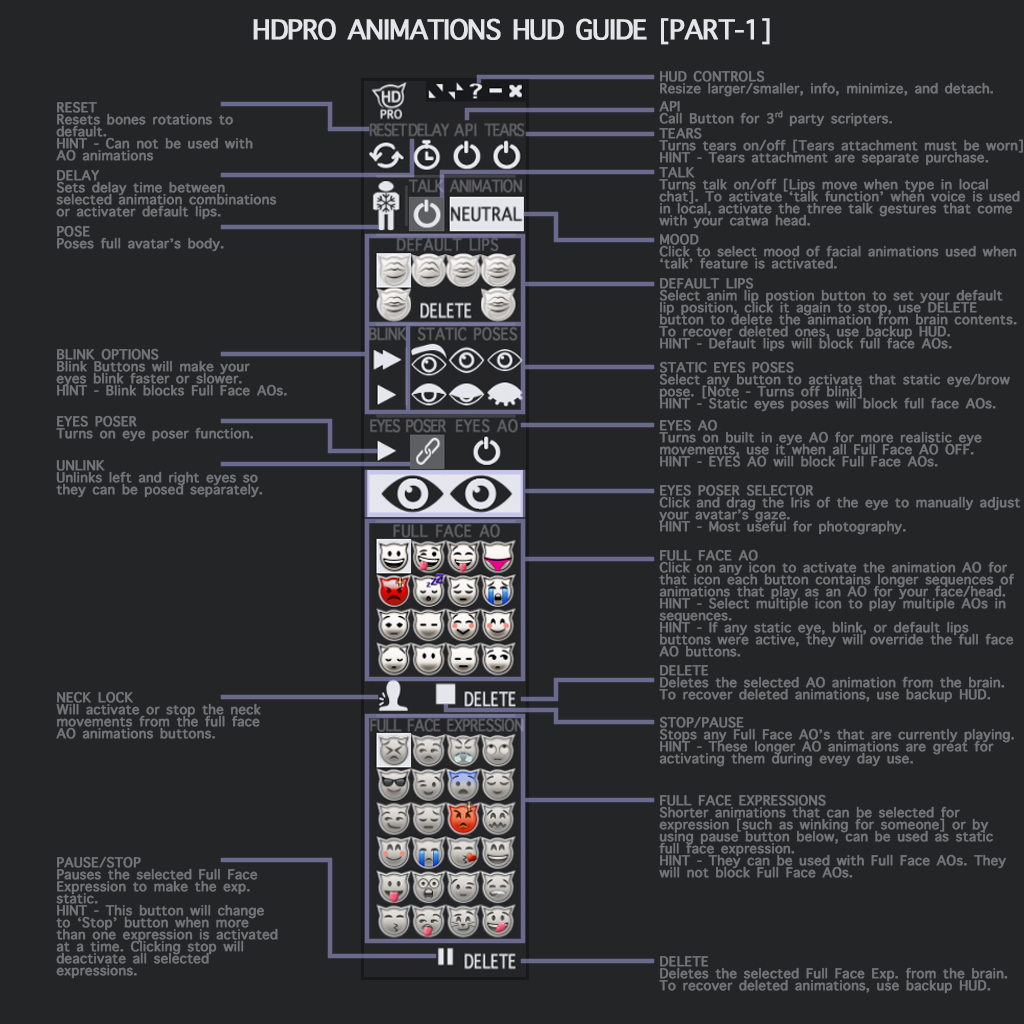
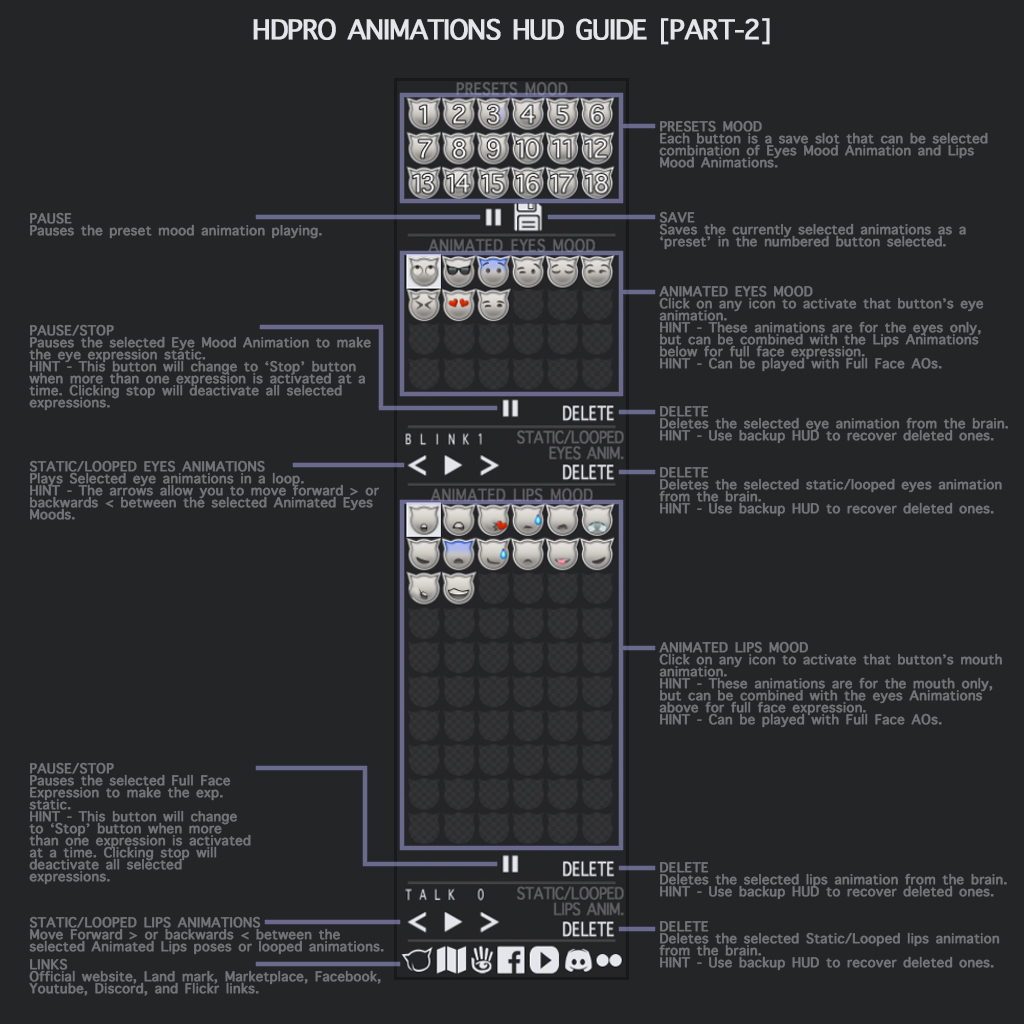
Explaining the HUD:
HUD Main Tabs:
-Freeze/pose body
-Freeze/pose eyes
-Freeze/pose mouth
-Tint
-Skin
-Eyes Mask
-Lashes
-Eyes
-Lips
-Mouth (inner, tongue, teeth)
-Ears
-Settings (show/hide, preset look save, reset, HUD skins, HUD
transparency/resize, del. scripts)
-Beyond Shapes sliders
-Info & Manual
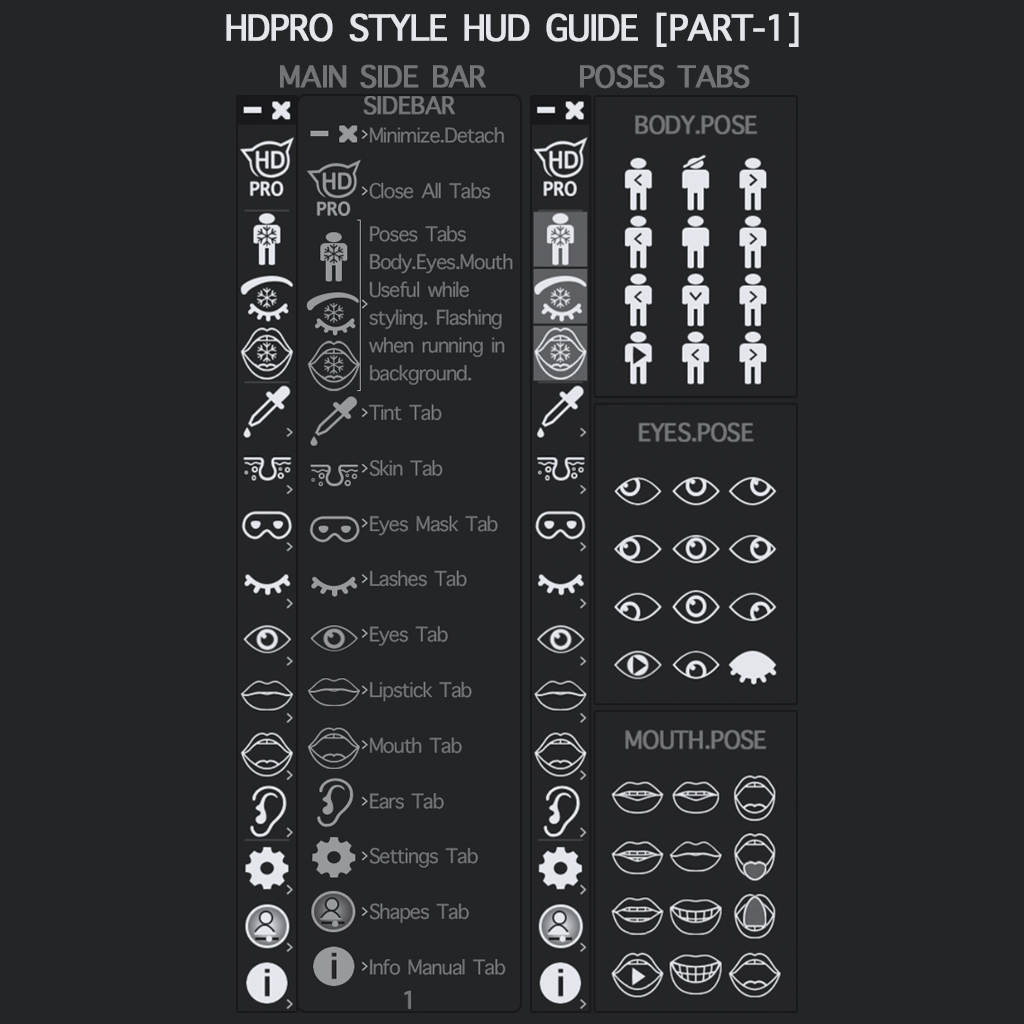
BODY.POSE TAB – Freeze/pose body
Freezes your body in a static pose with your head facing in different directions. Top centre button (head struck through) freezes the body but allows the head to move naturally. Lower left button (head with play button) freezes the body but cycles through all head poses in the other buttons. Centre button on the second row freezes both body and head facing front-and-centre.
EYES.POSE TAB – Freeze/pose eyes
Freezes your eyes in directional static poses. Lower left button (eye with play button) will cycle through all directions. Lower right button (closed lid with lashes) closes both eyes.
MOUTH.POSE TAB – Freeze/pose mouth
Freezes your mouth in different poses, allowing you to customise parts of the mouth (inner, tongue, teeth) or use as static photography poses. Lower left button (mouth with play button) cycles through all mouth poses.
Any combination of the POSE tabs can be open at any time, including all three. Any combination of them can also be open with any other tabs on the HUD.
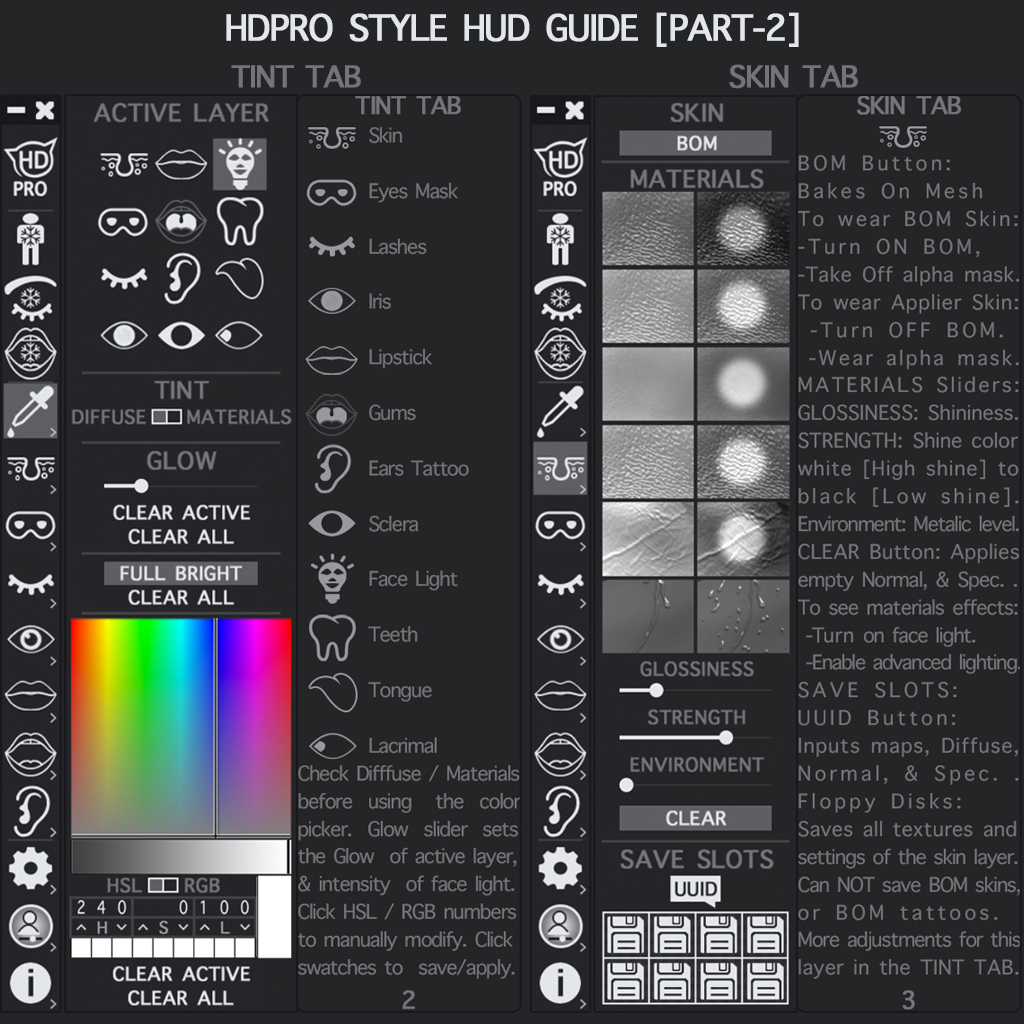
TINT PIPETTE TAB – Tint areas of your HDPRO head
ACTIVE LAYER
Allows you to select a part of your HDPRO head and tint it.
TINT DIFFUSE/MATERIALS
Select one of the two small boxes between DIFFUSE and MATERIALS to tint, activate glow, or activate full bright on the part selected under ACTIVE LAYER.
GLOW
Activates glow on part selected under ACTIVE LAYER. Use the slider to control the glow level. CLEAR ACTIVE will clear glow from the part currently selected under ACTIVE LAYER. CLEAR ALL will clear glow from all parts it has been applied to.
FULL BRIGHT
Activates full bright on part selected under ACTIVE LAYER. Click FULL BRIGHT again to remove full bright from selected part. CLEAR ALL will clear full bright from all parts it has been applied to.
TINT PANELS
Allows you to tint any part selected under ACTIVE LAYER (including changing the light from the facelight).
To use: click inside the large rainbow box to select your colour. Then click in the monochrome box beneath it to fill that box with all shades of that colour: darkest to the left, and palest to the right.
HSL/RGB: Allows you to enter HSL or RGB values instead of clicking the tint panels. Click one of the two small boxes between HSL and RGB to select the one you want to use. Then either use the up/down arrows in the boxes beneath to fine tune the values, or click the tall white box to the right and enter the values directly in the popup menu.
To save a tint, click one of the small white boxes at the bottom.
CLEAR ACTIVE will clear the tint from the part currently selected under ACTIVE LAYER. CLEAR ALL will clear the tint from all parts it has been applied to.
SKIN TAB
SKIN
Location of the BOM button. To activate BOM (Bakes on Mesh) on your head, detach worn alpha layers and click the BOM button. To deactivate BOM on your head, re-attach your alpha layers and re-apply your skin applier.
MATERIALS
Allows you to apply different materials to the skin, including skin details and pores, wrinkles, and sweat/water. Buttons on the left side apply materials. Buttons on the right side apply materials with a high spot shine.
Important: To see materials effects you must turn on the built-in facelight and enable Advanced Lighting in your viewer’s Graphics Preferences menu.
GLOSSINESS SLIDER – Controls gloss/shine amount
STRENGTH SLIDER – Controls shine colour from white (high shine) to black (low shine)
ENVIRONMENT SLIDER – Adds a slick, all-over, metallic shine. (Use sparingly!)
CLEAR will clear all materials from the head by applying empty normal and specular maps
UUID – Click to enter the UUID of any materials texture that you have created
SAVE SLOTS – Click to save any combination of materials, tints, etc. Note: This cannot save BoM skins or BoM tattoos, etc.
More adjustments for the skin tab can be found in the TINT tab.
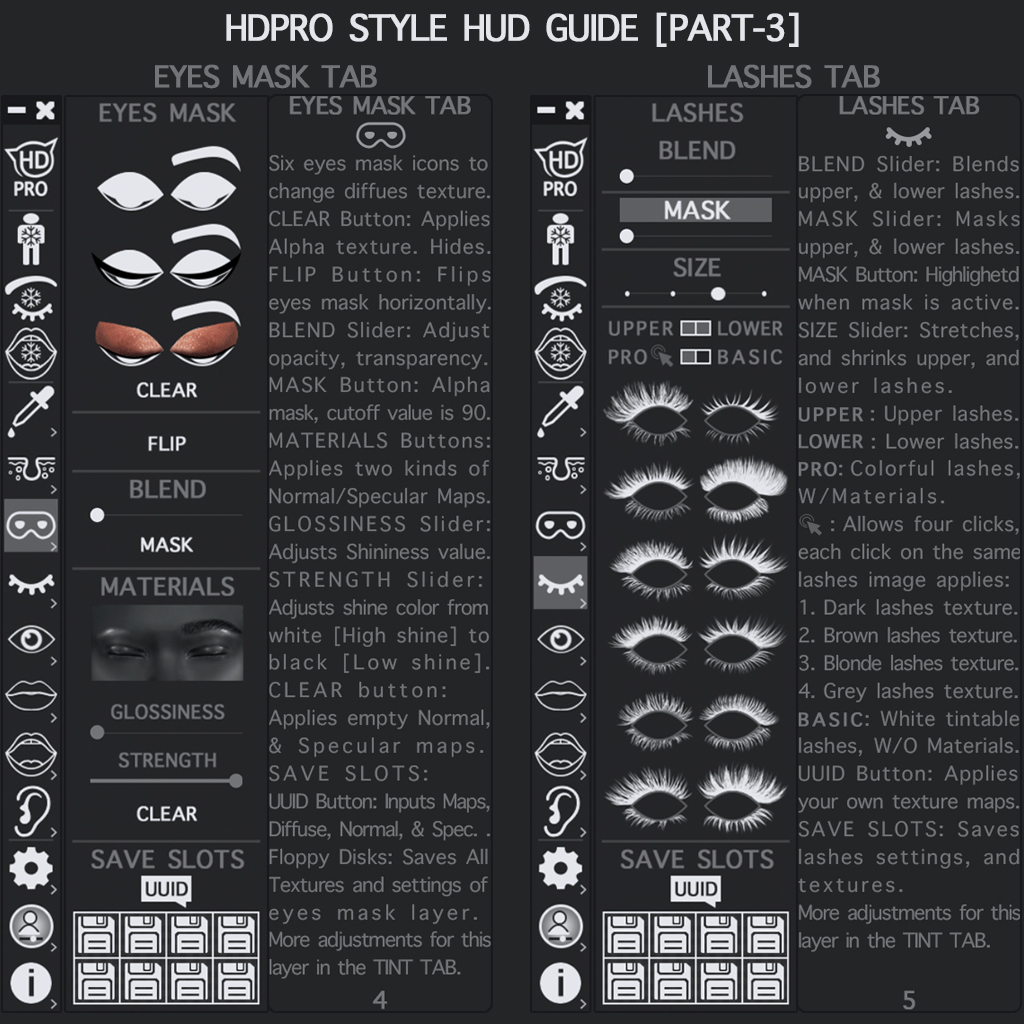
EYES MASK TAB
MASK IMAGES
These images apply different built-in appliers. All can be tinted (use the TINT panel) and have separate materials and blending. The Eye Mask area can have either brows OR eyeshadow, or a combined brow and eyeshadow applier. In order:
Top row L-R: Eyelid Only – Brow Only
Middle row L-R: Eyeliner Only – Brow & Eyeliner
Bottom row L-R: Eyeshadow – Brow & Eyeshadow
CLEAR – Clears the applied eye/brow appliers by applying an alpha texture
FLIP – Allows you to flip the textures from the left to the right eye and back again
BLEND – Allows you to blend the opacity of the mask images
MASK – Allows alpha masking of the eye appliers. Default cutoff value is 90
MATERIALS – Applies two kinds of materials (normal/specular maps) to the eye mask location.
GLOSSINESS – Adjusts the shininess value of materials
STRENGTH – Adjusts the shine colour from white (high shine) to black (low shine)
CLEAR – Applies empty normal and specular maps, thereby clearing appliers and materials from the eye mask area
UUID – Allows you to input the UUID of full permission texture maps that you own, for diffuse, normal, and specular
SAVE SLOTS – Saves all textures and settings of the eye mask area
More adjustments for the eyes mask tab can be found in the TINT tab.
LASHES TAB
BLEND SLIDER – Blends the upper and lower lashes (adjusting opacity)
MASK SLIDER – Masks the upper and lower lashes. MASK BUTTON will be highlighted when mask is active
SIZE SLIDER – Allows you to adjust the size of the lashes, stretching and shrinking both upper and lower
LASH ICONS
12 lash presets for both upper and lower. Can be applied individually by checking one of the two square boxes between UPPER and LOWER.
PRO/BASIC BUTTONS
PRO – Colourful lashes with materials. Click each lash icon four times to access four base colours: 1 = dark, 2 = brown, 3 = blonde, 4 = grey.
BASIC – White tintable lashes without materials
UUID – Allows you to input the UUID of full permission texture maps that you own
SAVE SLOTS – Saves all lash settings and textures
More adjustments for the lashes tab can be found in the TINT tab.
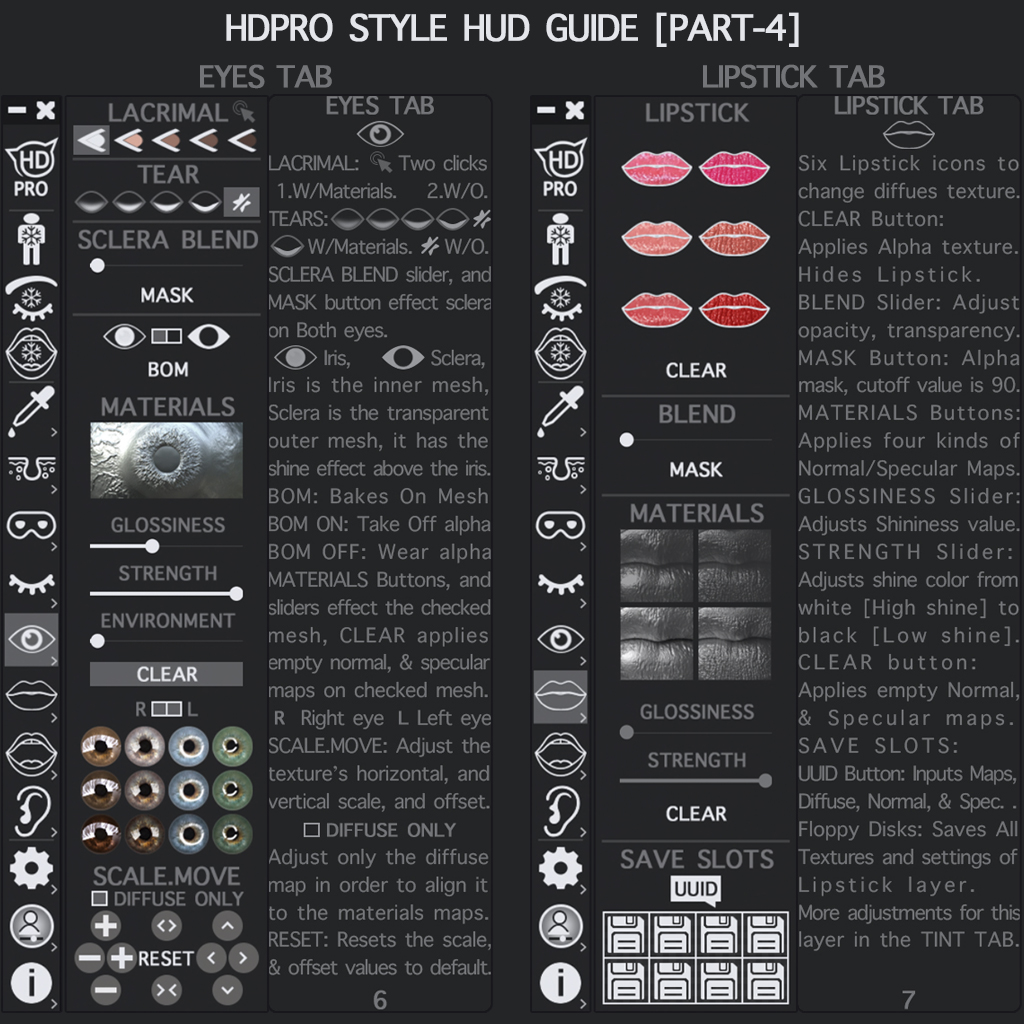
EYES TAB
LACRIMAL – Click each lacrimal icon once for lacrimal with materials, or a second time for lacrimal without materials. Four base lacrimal tones to choose from.
TEARS – Four options for waterline tears with materials, plus one option for waterline tears without materials (for when you don’t have high graphics settings).
SCLERA BLEND – Blends the sclera on both eyes
MASK – Masks the sclera on both eyes
IRIS/SCLERA ICONS – Check one of the two boxes between the icons to select that part
IRIS – ‘Black eye with white dot’ icon. The iris is the solid inner part of the eye that carries the eye texture itself
SCLERA – ‘White eye with black dot’ icon. The sclera is the transparent outer layer of the eye that puts the shine effect above the iris
BOM – Activates Bakes on Mesh on the selected part of the eye (iris or sclera). Detach your alpha layers when using BoM, and re-wear them when using eye appliers.
MATERIALS – Buttons and sliders will affect the mesh checked above (iris or sclera). CLEAR will apply empty normal and specular maps on the mesh checked above (iris or sclera). Example of use: If you’re trying to remove a materials highlight from your eye, ensure that you have SCLERA checked, and not IRIS.
To change eye texture: select IRIS and click one of the 12 eye icons
To change eye highlight: select SCLERA and click one of the 12 eye icons
Each eye can have colour and materials applied separately. Check one of the boxes between L and R above the 12 eye icons.
SCALE.MOVE
Allows you to adjust the eye texture’s horizontal and vertical scale and offset. DIFFUSE ONLY option, when checked, will allow you to move the diffuse (eye texture) map only, to align it with any applied materials maps.
RESET – Resets the scale and offset values to default
LIPS TAB
LIPS ICONS – Six lipstick icons to change diffuse texture. Lips can take Catwa HD lipstick appliers, Catwa non-HD lipstick appliers, and Omega lipstick appliers (Omega relay for Catwa required).
CLEAR – Applies an alpha texture to hide lipstick, clearing its texture
BLEND – Allows you to adjust opacity of lipstick
MASK – Allows you to mask the lipstick. Alpha mask cutoff value is set to 90.
MATERIALS – Allows you to add one of four materials options to the lips. Works over all applied lip appliers as well as BoM
GLOSSINESS – Adjusts the shininess value
STRENGTH – adjusts the shine colour from white (high shine) to black (low shine)
CLEAR – Applies empty normal and specular maps, clearing both lipstick appliers and materials
UUID – Allows you to input the UUID of full permission texture maps that you own, for diffuse, normal, and specular
SAVE SLOTS – Saves all lipstick settings and textures
More adjustments for the lips tab can be found in the TINT tab.
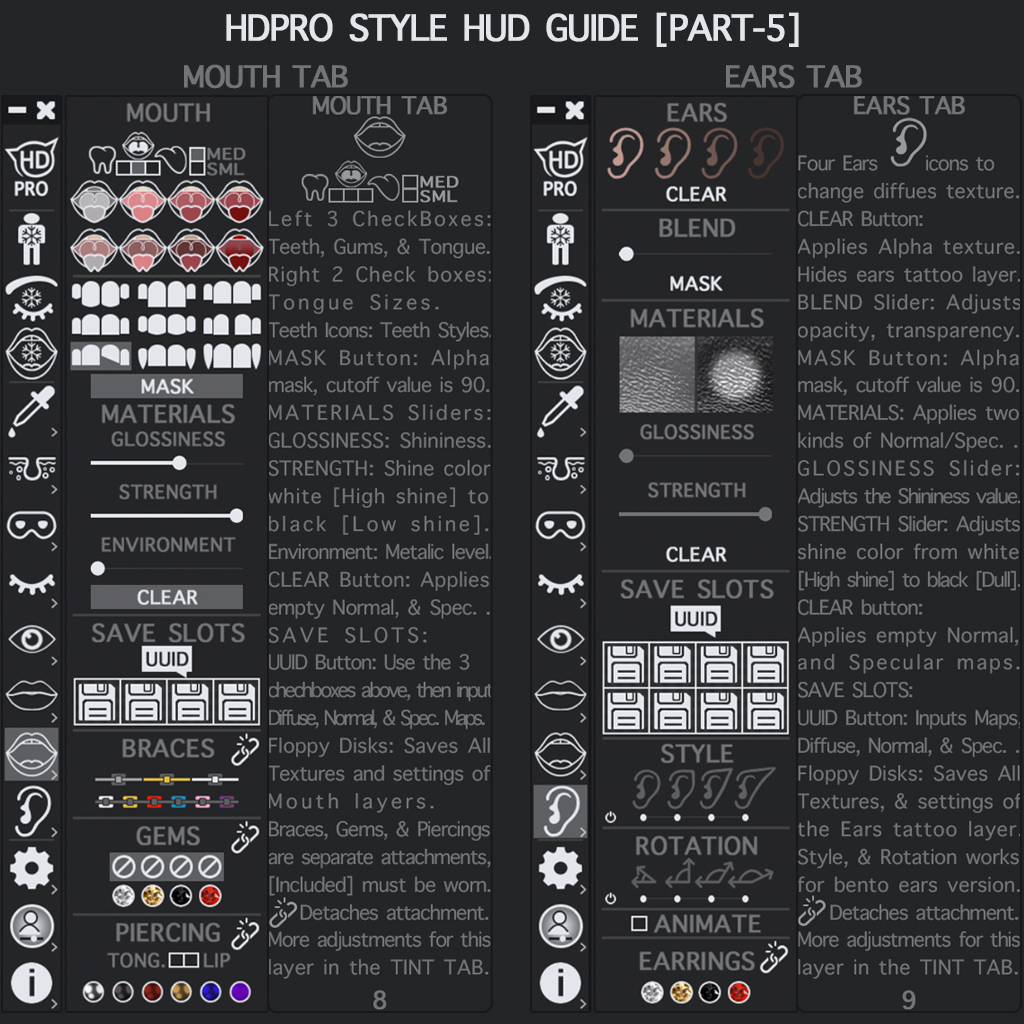
MOUTH TAB
Select one of the three checkboxes to affect areas.
Left = teeth
Middle = gums and inner mouth
Right = tongue
With an area selected, click one of the eight mouth icons below to apply that option to that area. Top row features normal tongue, bottom row features split tongue
MED/SMALL – Changes between two tongue sizes
TEETH ICONS – Choose between nine tooth styles
MASK – Masks the selected area. Mask cutoff value is set to 90
MATERIALS SLIDERS:
GLOSSINESS – Adjusts the shininess of the selected area
STRENGTH – Adjusts the shine colour from white (high shine) to black (low shine)
ENVIRONMENT – Adds a slick, all-over, metallic shine to the selected area (Use sparingly!)
CLEAR – Applies empty normal and specular maps to the selected area, clearing the applied settings
UUID – Allows you to input the UUID of full permission texture maps that you own – for diffuse, normal, and specular – to the selected area
SAVE SLOTS – Saves all settings and textures of the mouth layer
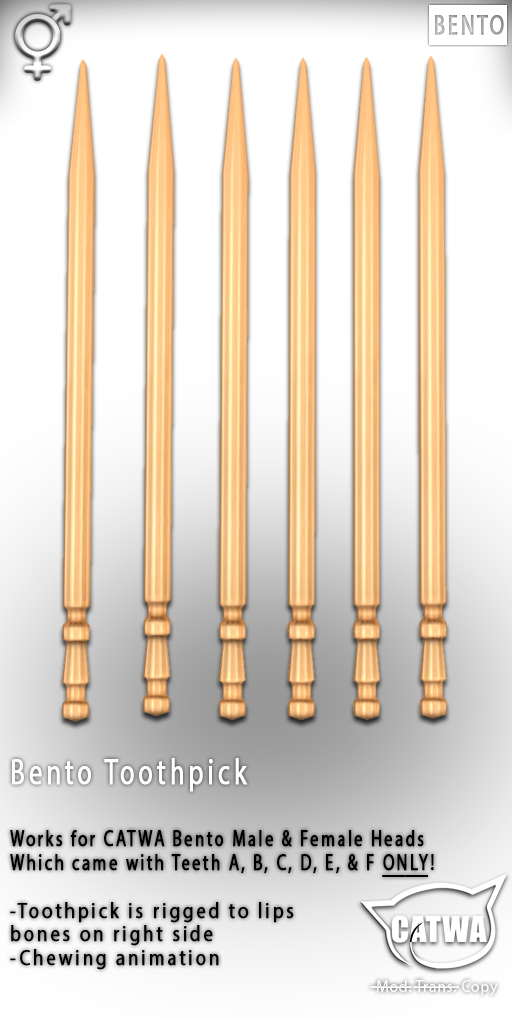
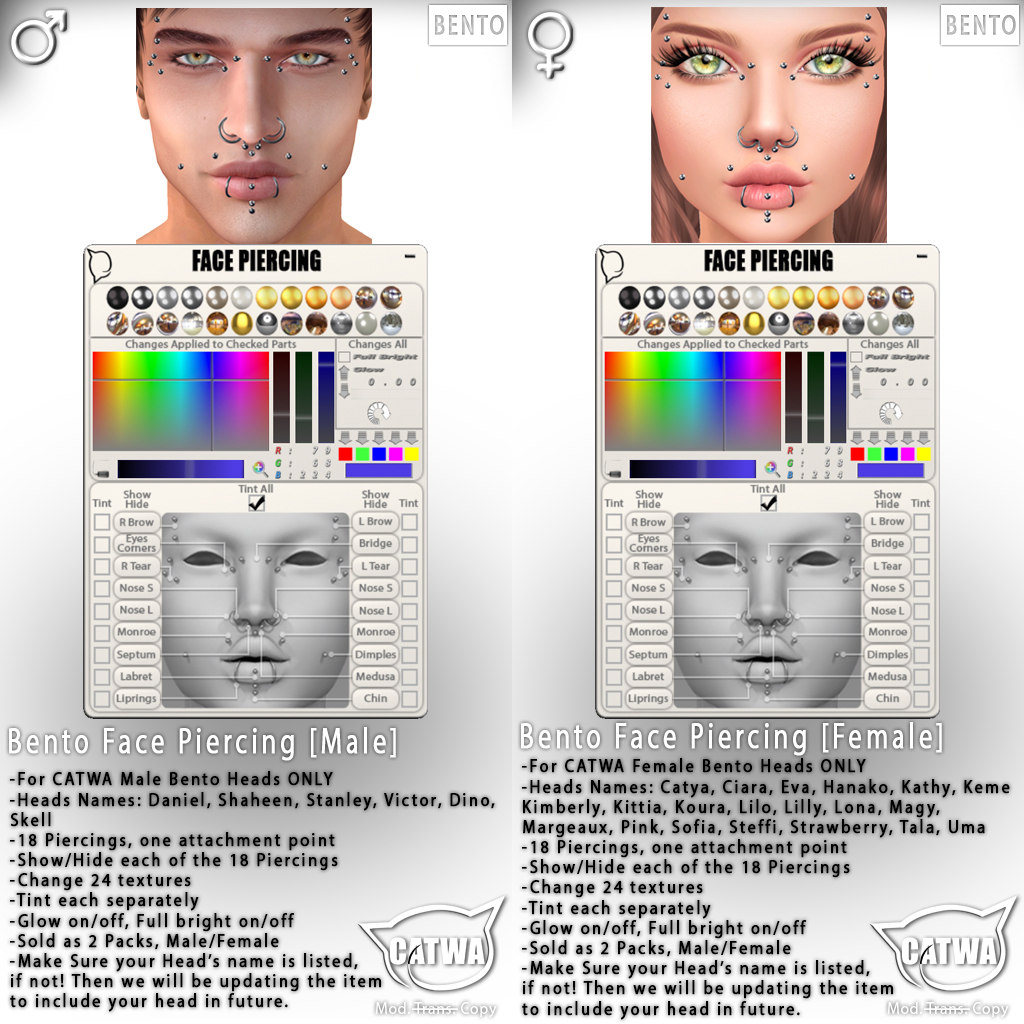
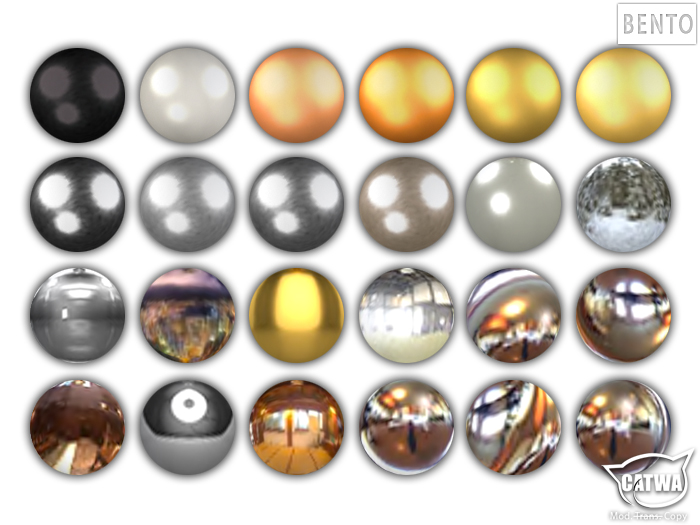
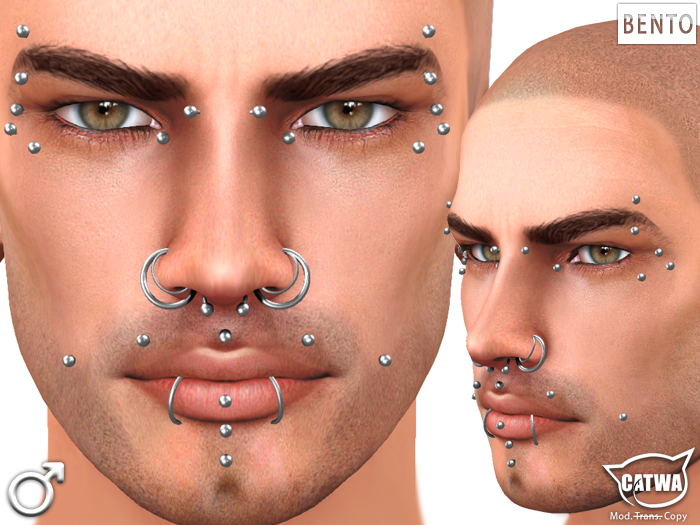
BRACES, GEMS, PIERCINGS – These are separate attachments in your head’s folder and must be worn before customising. Add them, then select required presets. ‘Link break’ icon will detach the attachment.
More adjustments for the mouth tab can be found in the TINT tab.
EARS TAB
Four ear icons to change the diffuse texture
CLEAR – Applies an alpha texture and hides the ear tattoo layer
BLEND – Adjusts opacity
MASK – Masks the ears. Default mask cutoff is 90
MATERIALS – Applies one of two normal/specular textures
GLOSSINESS – Adjusts the shininess of the selected area
STRENGTH – Adjusts the shine colour from white (high shine) to black (low shine)
CLEAR – Applies empty normal and specular maps and clears applied materials
UUID – Allows you to input the UUID of full permission texture maps that you own – for diffuse, normal, and specular – to the selected area
SAVE SLOTS – Saves all settings and textures of the ears tattoo layer
STYLE (Bento ears version only) – Switches between four options of ear style. (Ear tips can also be further adjusted using standard SL shape sliders.)
ROTATION (Bento ears version only) – Adjusts the rotation of the ears
ANIMATE (Bento ears version only) – When checked, your ears will animate gently. The head will detect whether you are standing, sitting, walking, or flying, and adjust the animations accordingly.
EARRINGS – These are separate attachments in your head’s folder and must be worn before customising. Add them, then select required presets. ‘Link break’ icon will detach the attachment.
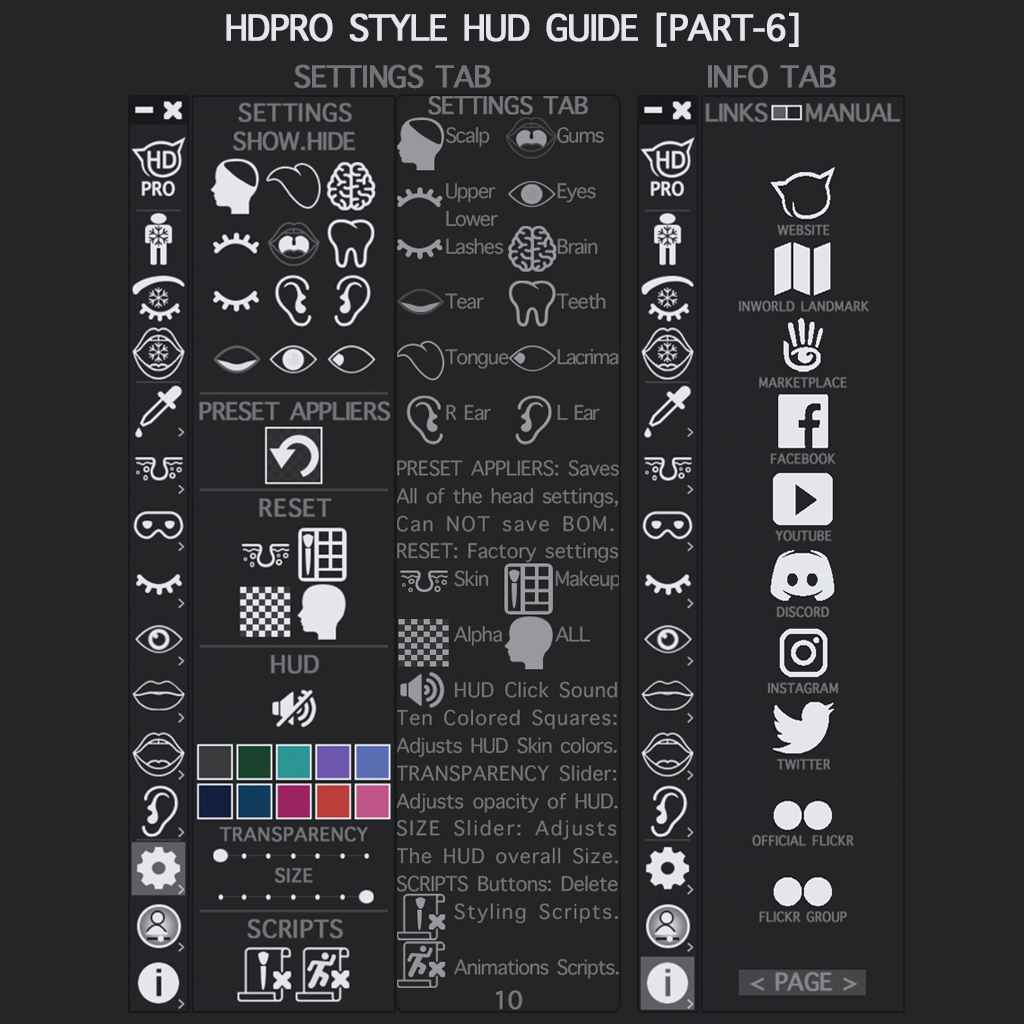
SETTINGS TAB
SHOW.HIDE – Select an icon to hide the corresponding part on your head. (Note: alpha layers can also be used for hiding, if you have specific requirements, e.g. for a particular hairstyle). Icons are:
Row 1: Scalp – Tongue – Brain
Row 2: Upper Lashes – Inner Mouth – Teeth
Row 3: Lower Lashes – Right Ear – Left Ear
Row 4: Tears – Iris – Lacrimal
Row 5: Tongue – Lacrimal
Row 6: Right Ear – Left Ear
PRESET APPLIERS – A one-click-save slow for all head appliers and settings. Use this for saving your current look. (Note: this will not save BoM.)
RESET – Sets the selected item back to factory default. Icons are:
Top row: Skin – Makeup
Bottom row: Alpha settings – Entire head (all settings)
HUD:
SPEAKER ICON – Click to switch HUD clicking sounds on/off
COLOURED SQUARES – Click to change the colour of your CATWA HDPRO HUDs. Affects Style HUD and Animation HUD
TRANSPARENCY SLIDER – Adjusts the opacity of your HUD
SIZE SLIDER – Adjusts the size of your HUD
SCRIPTS BUTTONS (USE WITH CAUTION – ALWAYS MAKE A BACKUP!) – Deletes the scripts in your head. ‘Paintbrush’ icon deletes styling scripts, ‘running man’ icon deletes animation scripts.
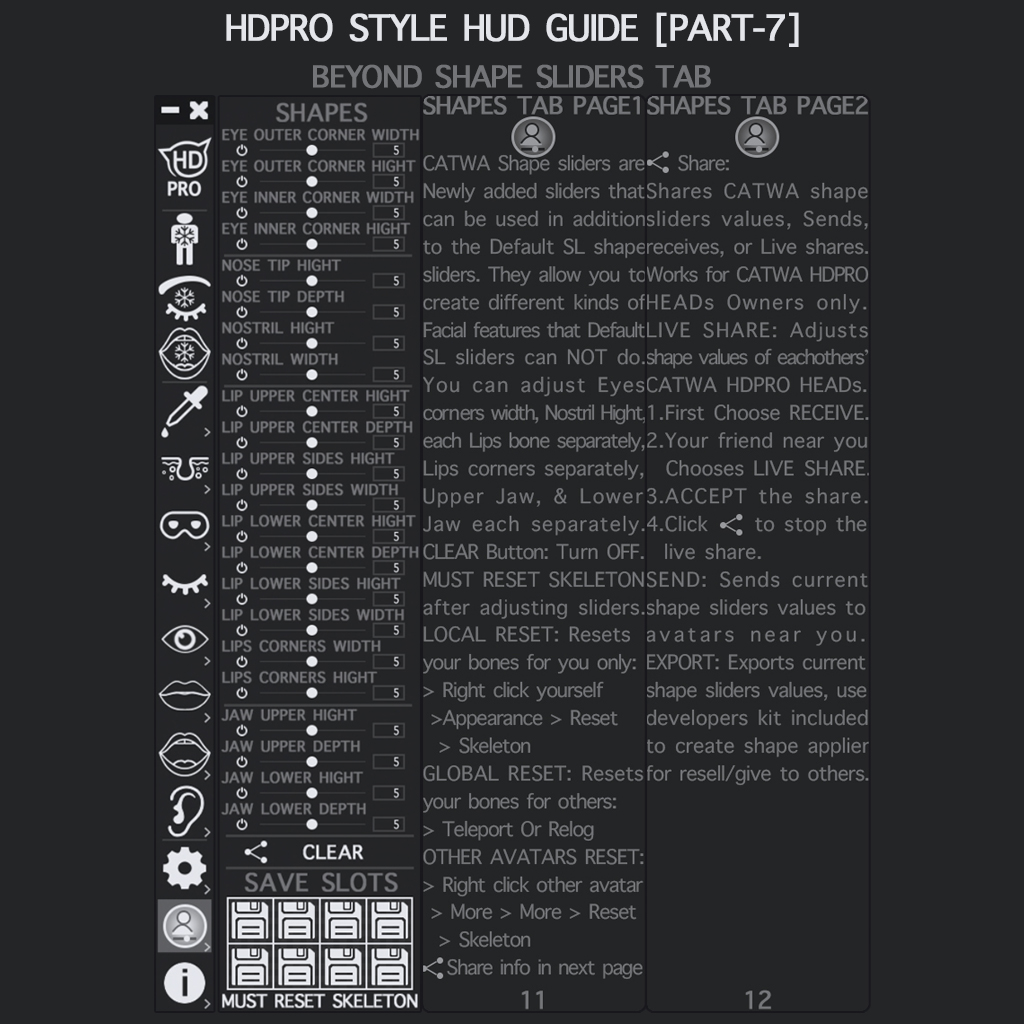
SHAPES TAB (PAGE 1 – SLIDERS & SAVE)
The CATWA BEYOND SHAPE Sliders are newly-added sliders that can be used in addition the the default SL shape sliders. They allow you to create different kinds of facial features that the default SL sliders cannot achieve.
Adjust each setting by using its slider. To clear all Beyond Shape Sliders, click the CLEAR button.
After using the Beyond Shape Sliders, you MUST reset your skeleton, regardless of whether you kept the sliders or cleared them. To reset your skeleton:
LOCALLY (resets skeleton for your view only) – Right-click yourself > Appearance > Reset > Skeleton
GLOBALLY (resets your skeleton for people viewing you) – Teleport or relog
To reset other avatars that have used Beyond Shape Sliders (so that you see them correctly) – Right-click them > More > More > Reset > Skeleton
SHARE ICON – See next page for Share information
SAVE SLOTS – Eight slots that allow you to save your Beyond Shape slider settings.
SHAPES TAB (PAGE 2 – SHARE)
The SHARE ICON allows you to share your CATWA Beyond Shape sliders with any other HDPRO user.
LIVE SHARE – Allows you to adjust the Beyond Shape sliders of another HDPRO user. You must both be near to each other for Beyond Shape to work.
To use:
- Recipient clicks SHARE icon, then RECEIVE
- You click SHARE icon, then LIVE SHARE
- Recipient ACCEPTS the share
- You can now edit the recipient’s Beyond Shape sliders. The Beyond Shape sliders in their HDPRO Style HUD will be greyed-out while this happens, and your Beyond Shape sliders will appear dotted
- When finished, click the SHARE button again to stop the live share
- Recipient now has the option to KEEP or ROLLBACK the Beyond Shape sliders that yuo changed
- Remember to RESET SKELETON!
SEND – Allows you to send your current worn Beyond Shape slider values to other CATWA HDPRO users near you
EXPORT – Allows you to export your Beyond Shape sliders, using the included Developer Kit to create a shape applier for resale or to give to others.
INFO
Select one of the two boxes between LINKS and MANUAL at the top of this tab.
LINKS – Clickable links to access:
- Catwa website
- Inworld store landmark
- Second Life Marketplace store
- YouTube
- Discord (new releases, support, chat)
- Official Catwa Flickr (new releases)
- Flickr group (for posting your images of Catwa products)
MANUAL – Takes you to a manual explaining each tab and its options
Text, some images, and some videos © Skell Dagger & © virtualbloke.com – Used with permission.